Membuat boot disk / startup disk pada Windows XP
Bagi pengguna microsoft dengan windows 98 atau 95 tentu ingat
bagaimana untuk membuat disk startup ketika windowsnya problem maupun
untuk mengistall ulang windowsnya. Startup pada windows 98 dan 95 hanya
membutuhkan sistem DOS yang sama dengan windowsnya dan kemudahan untuk
membuatnya dengan masuk ke menu my computer dan pilih create startup
disk, maka dengan menyediakan satu floppy maka startup sudah siap
digunakan.
Ketika pengguna win98/95 beralih menggunakan windows xp maka
fasilitas ini tidak diikut sertakan sehingga ketika win xp kita problem
maka mau tidak mau kita harus menggunakan CD instalasinya untuk
melakukan perbaikan/repair.
Sebetulnya kita masih dapat membuat startup/boot disk pada
windows xp, tentunya sedikit rumit tapi masih mudah dilakukan. Bootdisk
ini bisa digunakan pada partisi yang menggunkan sistem NTFS (win xp,
win 2000, server 2000/2003) dan FAT (win95, win98, win xp).
1. Pertama-tama siapkan sebuah disket floppy kosong lalu format
dahulu dengan command prompt(ms-dos console pada win xp),
ketikkan format a: , kemudian ENTER.
2. Copy file Ntldr dan Ntdetect.com, biasanya terdapat pada folder
C: pada komputer anda , bila sulit menemukan gunakan fasilitas
search pada win explorer. Atau pada folder I386 pada CD instalasi
win Xp Anda.
3. Buat file boot.ini dengan editor Anda, seperti notepad atau
wordpad, tuliskan perintah sebagai berikut:
[boot loader]
timeout=30
Default= multi(0)disk(0)rdisk(0)partition(1)\windows
[operating systems]
multi(0)disk(0)rdisk(0)partition(1)\windows="Windows XP"
perintah tersebut jika Win XP diinstall pada folder \windows dan
single-drive partition IDE. Jika Anda tidak menggunakan IDE drive
tetapi SCSI drive maka rubah multi(0) dengan scsi(0).
4. bootdisk siap digunakan dan restart komputer Anda.
Selamat mencoba!!
Hal yang bisa kita lakukan dengan bootdisk ini adalah:
1. bootsector yang rusak, dapat menggunakan Windows XP Recovery
Console.
2. MBR (master boot sector) yang rusak, dapat menggunakan Windows XP
Recovery Console.
3. Serangan virus, pastikan dahulu virusnya telah bersih dengan
program antivirus.
4. Hilang dan rusaknya file ntldr dan Ntdetect.com
Selain itu kita juga bisa menggunakan CD intalasi Win XP sebagai
bootdisknya. Cara diatas pernah dilakukan penulis ketika MBR penulis
rusak sehingga diperlukan recovery Win XP.
Tuesday, March 1, 2011
Boot XP LEBIH KENCENG!!!
Boot XP LEBIH KENCENG!!!
Syarat:
1 HDD di Primary IDE channel
1 CD/DVDROM di secondary channel
How??:
- Buka Notepad.exe, ketik: del c:windowsprefetch tosboot-*.* /q
simpan sebagai file ntosboot.bat di drive C
- Buka "Run", ketik: gpedit.msc
doble klik “Windows Settings” dibawah “Computer Configuration”, trus dobel klik lagi di “Shutdown” (di window bagian kanan).
lalu klik add, browse, trus cari deh tempat nyimpen file “ntosboot.bat” tadi, trus klik open, ok, apply trus ok.
- Buka "Run", trus ketik: “devmgmt.msc”. Dobel klik di “IDE ATA/ATAPI controllers” trus klik kanan di “Primary IDE Channel”
pilih “Properties”. pilih “Advanced Settings” tab, trus di device 0 atau 1 yg ‘device type’ nya ga di gelapin, pilih "none"
jangan "autodetect" trus klik Ok.
Kerjain sama kaya tadi buat “Secondary IDE channel” nya. abis ntu restart dah.
SELESAAAAAI
Syarat:
1 HDD di Primary IDE channel
1 CD/DVDROM di secondary channel
How??:
- Buka Notepad.exe, ketik: del c:windowsprefetch tosboot-*.* /q
simpan sebagai file ntosboot.bat di drive C
- Buka "Run", ketik: gpedit.msc
doble klik “Windows Settings” dibawah “Computer Configuration”, trus dobel klik lagi di “Shutdown” (di window bagian kanan).
lalu klik add, browse, trus cari deh tempat nyimpen file “ntosboot.bat” tadi, trus klik open, ok, apply trus ok.
- Buka "Run", trus ketik: “devmgmt.msc”. Dobel klik di “IDE ATA/ATAPI controllers” trus klik kanan di “Primary IDE Channel”
pilih “Properties”. pilih “Advanced Settings” tab, trus di device 0 atau 1 yg ‘device type’ nya ga di gelapin, pilih "none"
jangan "autodetect" trus klik Ok.
Kerjain sama kaya tadi buat “Secondary IDE channel” nya. abis ntu restart dah.
SELESAAAAAI
Cara Mempercepat Running Windows XP
1. Untuk menurunkan waktu booting dan meningkatkan performa, tidak usah
menggunakan software defrag pihak ketiga, gunakan saja perangkat Defragmenter yang
buatan (built-in) Windows, tidak akan jauh beda. Dan juga, sebaiknya menggunakan
Harddisk dengan tipe Ultra-133 atau Serial ATA (SATA) dengan buffer 8-MB.
2. Jika RAM PC kurang dari 512 MB, maka sebaiknya ditambah kapasitas memorinya.
Hal ini relatif tidak mahal dan akan membantu meningkatkan performa sistem Anda
secara dramatis.
3. Pastikan file system yang digunakan Windows XP adalah NTFS. Cara memeriksanya:
a. Buka Windows Explorer (My Computer)
b. Klik kanan pada drive C:
c. Klik Properties.
Kalau ternyata file system Anda menggunakan FAT32, maka untuk mengubahnya
adalah dengan cara sebagai berikut:
- Backup data-data penting dulu ya.
- Klik Start > Run > ketik CMD
- Setelah muncul jendela Command Prompt, ketik:
Code:
CONVERT C: /FS:NTFS
Catatan: Komputer jangan disela ketika melakukan konversi ini, dan juga dalam
keadaan bebas dari virus. File system yang digunakan oleh drive bootable (biasanya C:)
bisa FAT32 atau NTFS. Saya sangat merekomendasikan untuk menggunakan NTFS
demi keamanan superior, ketahanan dan efisiensi ruang yang lebih besar.
4. Non aktifkan File Indexing. Layanan File Indexing mengekstraksi informasi dari
dokumen-dokumen dan file-file lainnya yang ada pada harddisk dan membuat sebuah
"searchable keyword index" (index keyword pencarian). Bisa dibayangkan proses ini
sangat memberatkan sistem.
Cara kerjanya sbb:
Seorang user mencari kata, frase, atau properti sebuah dokumen, dari
dokumen-dokumen yang jumlahnya ratusan atau ribuan dan ia tidak tahu nama dari
dokumen yang dicari. Windows XP dengan fungsi built-in search masih bisa melakukan
berbagai macam jenis pencarian tanpa melibatkan Indexing Service. Tapi agak lebih
lama. Sistem Operasi harus membuka tiap file ketika diminta tolong mencari apa yang
user inginkan.
Kebanyakan orang tidak membutuhkan fitur pencarian ini. Yang biasanya membutuhkan
adalah lingkungan perusahaan yang besar dimana ribuan dokumen diletakkan pada
paling tidak satu server. Akan tetapi jika hanya semacam system builder, yang
kebanyakan kliennya adalah bisnis kecil dan menengah, dan jika para klien tidak
membutuhkan fitur tersebut, saya rekomendasikan supaya mendisfungsikannnya
(disable) layanan tersebut.
Caranya Mendisfungsikannya:
a. Buka Windows Explorer (My Computer)
b. Klik kanan pada drive C:
c. Pilih Properties
d. Hilangkan tanda centang (checklist) "Allow Indexing Service to index this disk for
fast file searching."
e. Klik tombol Apply, muncul: apply changes to "C: subfolders and files"
f. Klik tombol OK.
Jika ada pesan peringatan atau error muncul (seperti "Access is denied"), klik tombol
Ignore All.
5. Update driver VGA dan chipset motherboard, termasuk update BIOS dan
konfigurasinya. Carilah info-info tentang konfigurasi BIOS secara tepat di internet.
6. Kosongkan folder Prefetch windows setiap 3 bulan atau lebih.
Windows XP merekam sebagian dari data atau aplikasi yang sering digunakan agar
membuat proses load kelihatan lebih cepat ketika dipanggil oleh user. Hal ini bagus,
tetapi untuk waktu yang lama, folder prefetch bisa jadi kelebihan muatan referensi file
dan aplikasi yang tidak lagi digunakan. Jika hal itu terjadi, Windows XP akan
membuang-buang waktu dan memperlambat performa sistem, ketika melakukan load
aplikasi atau file. Tidak ada yang penting dalam folder tersebut, dan seluruh isinya aman
untuk dihapus.
Folder tersebut terletak di: C:¥WINDOWS¥Prefetch¥
7. Sekali sebulan jalankan disk cleanup.
Caranya:
a. Buka Windows Explorer (My Computer)
b. Klik kanan pada drive C:
c. Pilih Properties
d. Klik tombol Disk Cleanup dan delete semua file temporer.
8. Pada Device Manager, klik ganda pada IDE ATA/ATAPI Controllers device, dan
pastikan DMA di-enable (diaktifkan) untuk tiap drive yang terhubung ke Primary
Controller dan atau Secondary controller.
Lakukan hal ini dengan cara:
a. Klik ganda pada Primary IDE Channel. kemudian klik tab Advance Settings.
b. Pastikan Transfer Mode -nya diset pada "DMA if Available" untuk kedua Device 0
dan Device 1.
c. Lakukan hal serupa pada Secondary IDE Channel.
9. Upgrade Pengkabelan.
Untuk peningkatan teknologi harddisk, dibutuhkan pengakabelan yang akan mendorong
performa lebih baik.
Pastikan untuk menggunakan kabel 80-wire Ultra-133 untuk semua device IDE dan
gunakan konektor yang cocok dengan socket Master/Slave/Motherboard.
Kalo Device-nya cuma satu, harus dihubungkan pada konektor yang paling ujung dari
kabel pita (kabel data), jangan pada konektor yang di tengah kabel pita, jika tidak, maka
akan terjadi masalah sinyal. Pada harddisk ultra DMA, masalah sinyal ini bisa
mencegah harddisk memaksimalkan potensinya.
10. Buang semua spyware dari komputer.
Gunakan program gratisan seperti AdAware buatan Lavasoft atau SpyBot Search &
Destroy. Setelah program ini terinstal, pastikan untuk melakukan cek update dan
mendownloadnya jika ada, sebelum melakukan pencarian spyware di komputer.
Apapun program yang ditemukan bisa dihapus secara aman. Semua program gratisan
yang meminta spyware untuk dijalankan tidak akan berfungsi lagi. Jika
program-program gratisan itu masih dibutuhkan tinggal instal lagi saja.
11. Buang semua program atau item yang tidak perlu dari rutin (routin) Windows
Startup dengan menggunakan utilitas MSCONFIG.
Caranya:
a. Klik Start > Run > ketik MSCONFIG > klik OK
b. Klik tab StartUp ?> kemudian hilangkan checklist (tanda centang) dari program yang tidak diinginkan.
Tidak paham dengan item-item tersebut? Kunjungi WinTasks Process Library. Situs itu
memuat proses sistem, aplikasi yang diketahui dan juga tentang referensi spyware dan
penjelasannya. Atau bisa diidentifikasi nama item-item tersebut secara langsung dengan
menggunakan google.
12. Buang semua program yang tidak digunakan dari Add/Remove Programs di Control
Panel.
13. Matikan beberapa atau semua animasi yang tidak dibutuhkan dan nonaktifkan
(disable) active desktop.
Pada kenyataannya, untuk optimasi performa, matikan semua animasi. Windows Xp
menawarkan banyak setting-setting yang berbeda pada bagian ini.
Caranya:
a. Klik System Icon di Control Panel
b. Klik tab Advance
c. Klik tombol Settings pada kotak Performance.
d. Hilangkan checklist (tanda centang) opsi apa saja yang tidak ingin dijalankan.
Atau bisa langsung klik pada Radio Button: Adjust for best performance.
14. Kalo bisa mengedit Registry Windows XP, lakukan untuk meningkatkan performa
XP.
Bisa menggunakan software tweak atau manual mengedit registry. Di internet sudah
banyak tersebar.
15. Kunjungi situs update Microsoft Windows secara rutin dan download semua update
yang berlabel Critical.
Download juga Optional update yang dibutuhkan. (ingat, kalau software OS windows
XP -nya bajakan, jangan coba-coba untuk mengupdate, bisa dikasih "stempel" tanda
bajakan sama Microsoft yang justru akan memperlambat sistem ketika booting dan
running).
16. Update anti virus dalam sepekan sekali atau bahkan harian. Pastikan hanya satu
software yang terinstal. Menggabungkan lebih dari satu antivirus hanya akan
mengundang penyakit bagi performa dan kahandalan komputer.
17. Pastikan font yang terinstal kurang dari 500 jenis saja pada komputer. Makin banyak
font, makin lambatlah sistem. Walaupun windows XP lebih efisien dalam menangani
font dari pada versi sebelumnya, tapi kelebihan font akan berdampak pada melemahnya
sistem.
18. Jangan partisi harddisk. (Opsional saja)
NTFS File System Windows XP berjalan lebih efisien pada satu partisi yang besar. Data
tidak lebih aman pada partisi terpisah, dan format ulang tidak dibutuhkan untuk instal
ulang Sistem Operasi (OS). Satu partisi ini berfungsi agar tidak ada pembatasan oleh
partisi akan tetapi akan dibatasi oleh ukuran kapasitas harddisk itu sendiri. Sehingga
tidak perlu melakukan resize partisi yang meghabiskan waktu dan resiko kehilangan
data.
19. Lakukan pengecekan terhadap sistem RAM untuk memastikan beroperasi dengan
baik.
Saya merekomendasikan untuk menggunakan program gratisan MemTest86.
Setelah didownload, bisa membuat bootable CD atau disket (sesuai pilihan) yang akan
melakukan 10 macam tes pada memory PC secara otomatis setelah malakukan boot
dengan CD atau disket yang dibuat. Biarkan semua tes berjalan sampai paling tidak
melewati 3 tes selesai dari 10 tes. Jika program mendapati error, matikan dan cabut
listrik komputer, cabut RAM memory, ganti dengan yang lain dan lakukan tes lagi.
Ingat, memory yang rusak tidak bisa diperbaiki, dan hanya bisa diganti.
20. Jika terdapat CD atau DVD recorder / writer, carilah update firmware dari pabriknya.
Pada beberapa kasus, upgrade terbukti bisa mempercepat recorder tersebut dan biasanya
gratis.
21. Non aktifkan (disable) service (layanan) yang tidak penting.
Windows XP memasang banyak service yang tidak dibutuhkan. Untuk menentukan
service apa saja yang tidak dibutuhkan, buka situs Black Viper untuk konfigurasi
Windows XP.
22. Buka casing komputer dan bersihkan semua debu dan
"puing-puingnya". Sementara itu cek juga kipasnya, apakah putarannya masih
proporsional.
menggunakan software defrag pihak ketiga, gunakan saja perangkat Defragmenter yang
buatan (built-in) Windows, tidak akan jauh beda. Dan juga, sebaiknya menggunakan
Harddisk dengan tipe Ultra-133 atau Serial ATA (SATA) dengan buffer 8-MB.
2. Jika RAM PC kurang dari 512 MB, maka sebaiknya ditambah kapasitas memorinya.
Hal ini relatif tidak mahal dan akan membantu meningkatkan performa sistem Anda
secara dramatis.
3. Pastikan file system yang digunakan Windows XP adalah NTFS. Cara memeriksanya:
a. Buka Windows Explorer (My Computer)
b. Klik kanan pada drive C:
c. Klik Properties.
Kalau ternyata file system Anda menggunakan FAT32, maka untuk mengubahnya
adalah dengan cara sebagai berikut:
- Backup data-data penting dulu ya.
- Klik Start > Run > ketik CMD
- Setelah muncul jendela Command Prompt, ketik:
Code:
CONVERT C: /FS:NTFS
Catatan: Komputer jangan disela ketika melakukan konversi ini, dan juga dalam
keadaan bebas dari virus. File system yang digunakan oleh drive bootable (biasanya C:)
bisa FAT32 atau NTFS. Saya sangat merekomendasikan untuk menggunakan NTFS
demi keamanan superior, ketahanan dan efisiensi ruang yang lebih besar.
4. Non aktifkan File Indexing. Layanan File Indexing mengekstraksi informasi dari
dokumen-dokumen dan file-file lainnya yang ada pada harddisk dan membuat sebuah
"searchable keyword index" (index keyword pencarian). Bisa dibayangkan proses ini
sangat memberatkan sistem.
Cara kerjanya sbb:
Seorang user mencari kata, frase, atau properti sebuah dokumen, dari
dokumen-dokumen yang jumlahnya ratusan atau ribuan dan ia tidak tahu nama dari
dokumen yang dicari. Windows XP dengan fungsi built-in search masih bisa melakukan
berbagai macam jenis pencarian tanpa melibatkan Indexing Service. Tapi agak lebih
lama. Sistem Operasi harus membuka tiap file ketika diminta tolong mencari apa yang
user inginkan.
Kebanyakan orang tidak membutuhkan fitur pencarian ini. Yang biasanya membutuhkan
adalah lingkungan perusahaan yang besar dimana ribuan dokumen diletakkan pada
paling tidak satu server. Akan tetapi jika hanya semacam system builder, yang
kebanyakan kliennya adalah bisnis kecil dan menengah, dan jika para klien tidak
membutuhkan fitur tersebut, saya rekomendasikan supaya mendisfungsikannnya
(disable) layanan tersebut.
Caranya Mendisfungsikannya:
a. Buka Windows Explorer (My Computer)
b. Klik kanan pada drive C:
c. Pilih Properties
d. Hilangkan tanda centang (checklist) "Allow Indexing Service to index this disk for
fast file searching."
e. Klik tombol Apply, muncul: apply changes to "C: subfolders and files"
f. Klik tombol OK.
Jika ada pesan peringatan atau error muncul (seperti "Access is denied"), klik tombol
Ignore All.
5. Update driver VGA dan chipset motherboard, termasuk update BIOS dan
konfigurasinya. Carilah info-info tentang konfigurasi BIOS secara tepat di internet.
6. Kosongkan folder Prefetch windows setiap 3 bulan atau lebih.
Windows XP merekam sebagian dari data atau aplikasi yang sering digunakan agar
membuat proses load kelihatan lebih cepat ketika dipanggil oleh user. Hal ini bagus,
tetapi untuk waktu yang lama, folder prefetch bisa jadi kelebihan muatan referensi file
dan aplikasi yang tidak lagi digunakan. Jika hal itu terjadi, Windows XP akan
membuang-buang waktu dan memperlambat performa sistem, ketika melakukan load
aplikasi atau file. Tidak ada yang penting dalam folder tersebut, dan seluruh isinya aman
untuk dihapus.
Folder tersebut terletak di: C:¥WINDOWS¥Prefetch¥
7. Sekali sebulan jalankan disk cleanup.
Caranya:
a. Buka Windows Explorer (My Computer)
b. Klik kanan pada drive C:
c. Pilih Properties
d. Klik tombol Disk Cleanup dan delete semua file temporer.
8. Pada Device Manager, klik ganda pada IDE ATA/ATAPI Controllers device, dan
pastikan DMA di-enable (diaktifkan) untuk tiap drive yang terhubung ke Primary
Controller dan atau Secondary controller.
Lakukan hal ini dengan cara:
a. Klik ganda pada Primary IDE Channel. kemudian klik tab Advance Settings.
b. Pastikan Transfer Mode -nya diset pada "DMA if Available" untuk kedua Device 0
dan Device 1.
c. Lakukan hal serupa pada Secondary IDE Channel.
9. Upgrade Pengkabelan.
Untuk peningkatan teknologi harddisk, dibutuhkan pengakabelan yang akan mendorong
performa lebih baik.
Pastikan untuk menggunakan kabel 80-wire Ultra-133 untuk semua device IDE dan
gunakan konektor yang cocok dengan socket Master/Slave/Motherboard.
Kalo Device-nya cuma satu, harus dihubungkan pada konektor yang paling ujung dari
kabel pita (kabel data), jangan pada konektor yang di tengah kabel pita, jika tidak, maka
akan terjadi masalah sinyal. Pada harddisk ultra DMA, masalah sinyal ini bisa
mencegah harddisk memaksimalkan potensinya.
10. Buang semua spyware dari komputer.
Gunakan program gratisan seperti AdAware buatan Lavasoft atau SpyBot Search &
Destroy. Setelah program ini terinstal, pastikan untuk melakukan cek update dan
mendownloadnya jika ada, sebelum melakukan pencarian spyware di komputer.
Apapun program yang ditemukan bisa dihapus secara aman. Semua program gratisan
yang meminta spyware untuk dijalankan tidak akan berfungsi lagi. Jika
program-program gratisan itu masih dibutuhkan tinggal instal lagi saja.
11. Buang semua program atau item yang tidak perlu dari rutin (routin) Windows
Startup dengan menggunakan utilitas MSCONFIG.
Caranya:
a. Klik Start > Run > ketik MSCONFIG > klik OK
b. Klik tab StartUp ?> kemudian hilangkan checklist (tanda centang) dari program yang tidak diinginkan.
Tidak paham dengan item-item tersebut? Kunjungi WinTasks Process Library. Situs itu
memuat proses sistem, aplikasi yang diketahui dan juga tentang referensi spyware dan
penjelasannya. Atau bisa diidentifikasi nama item-item tersebut secara langsung dengan
menggunakan google.
12. Buang semua program yang tidak digunakan dari Add/Remove Programs di Control
Panel.
13. Matikan beberapa atau semua animasi yang tidak dibutuhkan dan nonaktifkan
(disable) active desktop.
Pada kenyataannya, untuk optimasi performa, matikan semua animasi. Windows Xp
menawarkan banyak setting-setting yang berbeda pada bagian ini.
Caranya:
a. Klik System Icon di Control Panel
b. Klik tab Advance
c. Klik tombol Settings pada kotak Performance.
d. Hilangkan checklist (tanda centang) opsi apa saja yang tidak ingin dijalankan.
Atau bisa langsung klik pada Radio Button: Adjust for best performance.
14. Kalo bisa mengedit Registry Windows XP, lakukan untuk meningkatkan performa
XP.
Bisa menggunakan software tweak atau manual mengedit registry. Di internet sudah
banyak tersebar.
15. Kunjungi situs update Microsoft Windows secara rutin dan download semua update
yang berlabel Critical.
Download juga Optional update yang dibutuhkan. (ingat, kalau software OS windows
XP -nya bajakan, jangan coba-coba untuk mengupdate, bisa dikasih "stempel" tanda
bajakan sama Microsoft yang justru akan memperlambat sistem ketika booting dan
running).
16. Update anti virus dalam sepekan sekali atau bahkan harian. Pastikan hanya satu
software yang terinstal. Menggabungkan lebih dari satu antivirus hanya akan
mengundang penyakit bagi performa dan kahandalan komputer.
17. Pastikan font yang terinstal kurang dari 500 jenis saja pada komputer. Makin banyak
font, makin lambatlah sistem. Walaupun windows XP lebih efisien dalam menangani
font dari pada versi sebelumnya, tapi kelebihan font akan berdampak pada melemahnya
sistem.
18. Jangan partisi harddisk. (Opsional saja)
NTFS File System Windows XP berjalan lebih efisien pada satu partisi yang besar. Data
tidak lebih aman pada partisi terpisah, dan format ulang tidak dibutuhkan untuk instal
ulang Sistem Operasi (OS). Satu partisi ini berfungsi agar tidak ada pembatasan oleh
partisi akan tetapi akan dibatasi oleh ukuran kapasitas harddisk itu sendiri. Sehingga
tidak perlu melakukan resize partisi yang meghabiskan waktu dan resiko kehilangan
data.
19. Lakukan pengecekan terhadap sistem RAM untuk memastikan beroperasi dengan
baik.
Saya merekomendasikan untuk menggunakan program gratisan MemTest86.
Setelah didownload, bisa membuat bootable CD atau disket (sesuai pilihan) yang akan
melakukan 10 macam tes pada memory PC secara otomatis setelah malakukan boot
dengan CD atau disket yang dibuat. Biarkan semua tes berjalan sampai paling tidak
melewati 3 tes selesai dari 10 tes. Jika program mendapati error, matikan dan cabut
listrik komputer, cabut RAM memory, ganti dengan yang lain dan lakukan tes lagi.
Ingat, memory yang rusak tidak bisa diperbaiki, dan hanya bisa diganti.
20. Jika terdapat CD atau DVD recorder / writer, carilah update firmware dari pabriknya.
Pada beberapa kasus, upgrade terbukti bisa mempercepat recorder tersebut dan biasanya
gratis.
21. Non aktifkan (disable) service (layanan) yang tidak penting.
Windows XP memasang banyak service yang tidak dibutuhkan. Untuk menentukan
service apa saja yang tidak dibutuhkan, buka situs Black Viper untuk konfigurasi
Windows XP.
22. Buka casing komputer dan bersihkan semua debu dan
"puing-puingnya". Sementara itu cek juga kipasnya, apakah putarannya masih
proporsional.
Friday, March 26, 2010
11 tips for social networking safety
Social networking Web sites like MySpace, Facebook, Twitter, and Windows Live Spaces are services people can use to connect with others to share information like photos, videos, and personal messages.
As the popularity of these social sites grows, so do the risks of using them. Hackers, spammers, virus writers, identity thieves, and other criminals follow the traffic.
Read these tips to help protect yourself when you use social networks.
1. Use caution when you click links that you receive in messages from your friends on your social Web site. Treat links in messages on these sites as you would links in e-mail messages.
2. Know what you've posted about yourself. A common way that hackers break into financial or other accounts is by clicking the "Forgot your password?" link on the account login page. To break into your account, they search for the answers to your security questions, such as your birthday, home town, high school class, father's middle name, on your social networking site. If the site allows, make up your own password questions, and don't draw them from material anyone could find with a quick search.
3. Don't trust that a message is really from who it says it's from. Hackers can break into accounts and send messages that look like they're from your friends, but aren't. If you suspect that a message is fraudulent, use an alternate method to contact your friend to find out. This includes invitations to join new social networks.
4. To avoid giving away e-mail addresses of your friends, do not allow social networking services to scan your e-mail address book. When you join a new social network, you might receive an offer to enter your e-mail address and password to find out if your contacts are on the network. The site might use this information to send e-mail messages to everyone in your contact list or even everyone you've ever sent an e-mail message to with that e-mail address. Social networking sites should explain that they're going to do this, but some do not.
5. Type the address of your social networking site directly into your browser or use your personal bookmarks. If you click a link to your site through e-mail or another Web site, you might be entering your account name and password into a fake site where your personal information could be stolen.
6. Be selective about who you accept as a friend on a social network. Identity thieves might create fake profiles in order to get information from you.
7. Choose your social network carefully. Evaluate the site that you plan to use and make sure you understand the privacy policy. Find out if the site monitors content that people post. You will be providing personal information to this Web site, so use the same criteria that you would to select a site where you enter your credit card.
8. Assume that everything you put on a social networking site is permanent. Even if you can delete your account, anyone on the Internet can easily print photos or text or save images and videos to a computer.
9. Be careful about installing extras on your site. Many social networking sites allow you to download third-party applications that let you do more with your personal page. Criminals sometimes use these applications to steal your personal information. To download and use third-party applications safely, take the same safety precautions that you take with any other program or file you download from the Web.
10. Think twice before you use social networking sites at work.
11. Talk to your kids about social networking. If you're a parent of children who use social networking sites.
Source : http://www.microsoft.com/protect/parents/social/socialnet.aspx
As the popularity of these social sites grows, so do the risks of using them. Hackers, spammers, virus writers, identity thieves, and other criminals follow the traffic.
Read these tips to help protect yourself when you use social networks.
1. Use caution when you click links that you receive in messages from your friends on your social Web site. Treat links in messages on these sites as you would links in e-mail messages.
2. Know what you've posted about yourself. A common way that hackers break into financial or other accounts is by clicking the "Forgot your password?" link on the account login page. To break into your account, they search for the answers to your security questions, such as your birthday, home town, high school class, father's middle name, on your social networking site. If the site allows, make up your own password questions, and don't draw them from material anyone could find with a quick search.
3. Don't trust that a message is really from who it says it's from. Hackers can break into accounts and send messages that look like they're from your friends, but aren't. If you suspect that a message is fraudulent, use an alternate method to contact your friend to find out. This includes invitations to join new social networks.
4. To avoid giving away e-mail addresses of your friends, do not allow social networking services to scan your e-mail address book. When you join a new social network, you might receive an offer to enter your e-mail address and password to find out if your contacts are on the network. The site might use this information to send e-mail messages to everyone in your contact list or even everyone you've ever sent an e-mail message to with that e-mail address. Social networking sites should explain that they're going to do this, but some do not.
5. Type the address of your social networking site directly into your browser or use your personal bookmarks. If you click a link to your site through e-mail or another Web site, you might be entering your account name and password into a fake site where your personal information could be stolen.
6. Be selective about who you accept as a friend on a social network. Identity thieves might create fake profiles in order to get information from you.
7. Choose your social network carefully. Evaluate the site that you plan to use and make sure you understand the privacy policy. Find out if the site monitors content that people post. You will be providing personal information to this Web site, so use the same criteria that you would to select a site where you enter your credit card.
8. Assume that everything you put on a social networking site is permanent. Even if you can delete your account, anyone on the Internet can easily print photos or text or save images and videos to a computer.
9. Be careful about installing extras on your site. Many social networking sites allow you to download third-party applications that let you do more with your personal page. Criminals sometimes use these applications to steal your personal information. To download and use third-party applications safely, take the same safety precautions that you take with any other program or file you download from the Web.
10. Think twice before you use social networking sites at work.
11. Talk to your kids about social networking. If you're a parent of children who use social networking sites.
Source : http://www.microsoft.com/protect/parents/social/socialnet.aspx
Clean Your Computer
I have a dirty secret. I've never cleaned my computer. Sure, I've dusted my monitor, but I haven't taken off the cover or tried to reach the crumbs lurking inside my keyboard.
clean your computer
"Your computer could fry if you don't keep it clean," says Jonathon Millman, chief technology officer for Hooplah Interactive.
Dust clogs the vents behind your computer, which causes your CPU to heat up—and heat is the biggest cause of component failure in computers. Regular cleaning could save you costly maintenance fees down the road.
Keep your computer in tip-top shape by following Millman's guide to a spotless computer system.
Preparation
You'll need:
*
screwdriver
*
can of compressed air (available from computer dealers or office-supply stores)
*
cotton swabs (do not use a cotton ball)
*
rubbing alcohol
*
paper towels or anti-static cloths
*
water
Always turn your computer off before you begin and unplug all the cords.
Step 1: Inside the case
Using a screwdriver, remove the side of the case that's opposite your motherboard. Touch as little as possible inside the computer, keeping fingers away from cards and cords.
Blow air around all of the components and along the bottom of the case, keeping the nozzle four inches away from the machine. Blow air into the power supply box and into the fan (from the back of the case). Lastly, blow air into the floppy disk and CD drives. Wipe the inside of the cover with a lightly moistened cloth before replacing it.
Millman recommends doing this every three months if your case sits on the floor, if you have pets that shed, or if you smoke. Otherwise, every six to eight months is fine.
Step 2: Outside the case
Run a cotton swab dipped in rubbing alcohol around all of the openings on the back of your case. Give them one swipe with the damp end of the swab and one swipe with the dry end. Do this as often as you clean the inside of your computer.
Step 3: Keyboard
Turn the keyboard upside down and gently shake it. Most of the crumbs and dust will fall out. Take a can of compressed air and blow into and around the keys. Next, take a cotton swab and dip it in rubbing alcohol. It should be damp, but not wet. Run the cotton swab around the outside of the keys. Rub the tops of the keys. If you have a laptop, follow the same procedure but take extra care with your machine. Do this monthly.
Spills — If you have kids, you're worried about spills. If it happens, immediately turn off your computer, disconnect the keyboard, and flip it over. While the keyboard is upside down, blot the top with a paper towel, blow compressed air between the keys and leave it to air dry overnight. For laptops, liquid can easily penetrate the hard drive so turn the computer over immediately and and then leave it to air dry overnight.
Laptop spills need more attention because liquid can easily penetrate the keyboard and damage internal parts. For laptop spills, immediately turn off the computer and remove any external power source and other items plugged into it. Turn the laptop over, remove the battery, and then bring it to your nearest repair center to check for internal damage. Simply blowing compressed air into the keyboard and letting your computer air dry upside down overnight aren't enough because liquids can sit inside a laptop for days.
For all spills, be aware that anything other than plain water may cause severe damage, and never attempt to dry a keyboard or laptop in a microwave or conventional oven.
Step 4: Mouse
Rub the top and bottom of your mouse with a paper towel dipped in rubbing alcohol. Open the back and remove the ball. Wash the ball with water and let it air dry. To clean inside the mouse, dip a cotton swab in rubbing alcohol and rub all of the components. Scrape hard-to-remove grime with your fingernail. Finally, blow air into the opening. Replace the ball and the cover. Do this monthly.
Step 5: Monitor
Moisten a paper towel or a soft, lint-free cloth with water. (You can also buy monitor cleaning products at computer-supply stores.) Don't spray liquid directly onto the screen—spray the cloth instead. Wipe the screen gently to remove dust and fingerprints. Never touch the back of the monitor.
For laptop screens, Millman suggests buying a special cleaning solution available at computer stores. Do this weekly.
Finally, make sure that everything is dry before you plug your computer back in.
Article written by Alyson Munroe and adapted from an original piece from Microsoft Home Magazine.
Source: http://www.microsoft.com/athome/setup/cleancomputer.aspx
clean your computer
"Your computer could fry if you don't keep it clean," says Jonathon Millman, chief technology officer for Hooplah Interactive.
Dust clogs the vents behind your computer, which causes your CPU to heat up—and heat is the biggest cause of component failure in computers. Regular cleaning could save you costly maintenance fees down the road.
Keep your computer in tip-top shape by following Millman's guide to a spotless computer system.
Preparation
You'll need:
*
screwdriver
*
can of compressed air (available from computer dealers or office-supply stores)
*
cotton swabs (do not use a cotton ball)
*
rubbing alcohol
*
paper towels or anti-static cloths
*
water
Always turn your computer off before you begin and unplug all the cords.
Step 1: Inside the case
Using a screwdriver, remove the side of the case that's opposite your motherboard. Touch as little as possible inside the computer, keeping fingers away from cards and cords.
Blow air around all of the components and along the bottom of the case, keeping the nozzle four inches away from the machine. Blow air into the power supply box and into the fan (from the back of the case). Lastly, blow air into the floppy disk and CD drives. Wipe the inside of the cover with a lightly moistened cloth before replacing it.
Millman recommends doing this every three months if your case sits on the floor, if you have pets that shed, or if you smoke. Otherwise, every six to eight months is fine.
Step 2: Outside the case
Run a cotton swab dipped in rubbing alcohol around all of the openings on the back of your case. Give them one swipe with the damp end of the swab and one swipe with the dry end. Do this as often as you clean the inside of your computer.
Step 3: Keyboard
Turn the keyboard upside down and gently shake it. Most of the crumbs and dust will fall out. Take a can of compressed air and blow into and around the keys. Next, take a cotton swab and dip it in rubbing alcohol. It should be damp, but not wet. Run the cotton swab around the outside of the keys. Rub the tops of the keys. If you have a laptop, follow the same procedure but take extra care with your machine. Do this monthly.
Spills — If you have kids, you're worried about spills. If it happens, immediately turn off your computer, disconnect the keyboard, and flip it over. While the keyboard is upside down, blot the top with a paper towel, blow compressed air between the keys and leave it to air dry overnight. For laptops, liquid can easily penetrate the hard drive so turn the computer over immediately and and then leave it to air dry overnight.
Laptop spills need more attention because liquid can easily penetrate the keyboard and damage internal parts. For laptop spills, immediately turn off the computer and remove any external power source and other items plugged into it. Turn the laptop over, remove the battery, and then bring it to your nearest repair center to check for internal damage. Simply blowing compressed air into the keyboard and letting your computer air dry upside down overnight aren't enough because liquids can sit inside a laptop for days.
For all spills, be aware that anything other than plain water may cause severe damage, and never attempt to dry a keyboard or laptop in a microwave or conventional oven.
Step 4: Mouse
Rub the top and bottom of your mouse with a paper towel dipped in rubbing alcohol. Open the back and remove the ball. Wash the ball with water and let it air dry. To clean inside the mouse, dip a cotton swab in rubbing alcohol and rub all of the components. Scrape hard-to-remove grime with your fingernail. Finally, blow air into the opening. Replace the ball and the cover. Do this monthly.
Step 5: Monitor
Moisten a paper towel or a soft, lint-free cloth with water. (You can also buy monitor cleaning products at computer-supply stores.) Don't spray liquid directly onto the screen—spray the cloth instead. Wipe the screen gently to remove dust and fingerprints. Never touch the back of the monitor.
For laptop screens, Millman suggests buying a special cleaning solution available at computer stores. Do this weekly.
Finally, make sure that everything is dry before you plug your computer back in.
Article written by Alyson Munroe and adapted from an original piece from Microsoft Home Magazine.
Source: http://www.microsoft.com/athome/setup/cleancomputer.aspx
Saturday, March 20, 2010
Cleopatra : Riddle of the tomb


Genre : Puzzle
Requirements
Minimum:
OS: Windows® 2000/ME/XP/Vista™
Processor: 800 MHz Pentium® 3 or Equivalent
RAM: 128 MB
Graphics Card: 64 MB DirectX® 9.0c Compatible
Sound Card: DirectX® Sound Card
DVD-ROM: 4x
Input: Keyboard, Mouse and Speakers
Hard Disk: 1.8 GB Free Disk Space
DirectX®: Version 9.0c
Recommended:
OS: Windows® XP/Vista™
Processor: 1 GHz Pentium® 4
RAM: 256 MB
Graphics Card: 128 MB DirectX® 9.0c Compatible
Sound Card: DirectX® Sound Card
DVD-ROM: 8x
Input: Keyboard, Mouse and Speakers
Hard Disk: 1.8 GB Free Disk Space
DirectX®: Version 9.0c
3 part, total 1,7 giga
Direct download link:
Part 1 600mb
Part 2 600mb
Part 3 507mb
Enjoy :p
Subscribe to:
Posts (Atom)
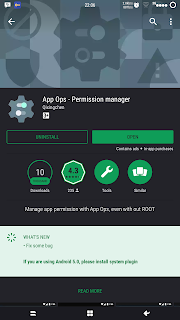
How to Fix Android App Usage Access Required Issue
After upgrading my G Pro2 to Android Marshmallow Resurection remix, I've got some issue about App Usage Access for some of my installed ...
-
 After upgrading my G Pro2 to Android Marshmallow Resurection remix, I've got some issue about App Usage Access for some of my installed ...
 -
S.T.A.L.K.E.R.: Clear Sky cd-Key`s FK47-S4JT-576Q-GZTM 9T2Q-PN3B-5YHZ-D4VV 6GJC-9MS9-X4NE-6S6H ASF6-YT52-5LJ2-75X6 AXJ2-DVX4-VUX8-TXQA 2J3G-...
-
 Setelah berkali-kali mencoba daftar lewat Bpjs-Kesehatan Online ternyata gagal terus.. payah deh. Ternyata permasalahan nya no Kartu Keluar...